On the sixth of November 2018 Login VSI introduced the Release of Login PI 3. In this blog I will take you with me during my exploration of this new version of Login PI.
Version 3 of Login PI is been designed and built from scratch. The need for a windows server to run the application on is gone. Login PI 3 is based on an appliance. To be able to run the appliance you will need ESX 5.5, 6.0 or 6.5. To setup and configure the appliance you will need to download the OVA template from the LoginVSI website.
The appliance needs:
2vCPU
4GB Memory
100 GB disk
After importing the OVA to a VM, you can start the VM. On the console you will run the initial setup where you will configure the following options:
Fully Qualified Domain Name (FQDN)
Dynamic or Static IP
Admin password
You will have to have a DNS record for the FQDN (step 2) that points to the IP (step 1).
After you have setup the entire appliance it will automatically reboot. After which you will be able to go to the webinterface, by browsing to the FQDN of the PI server.
After login you will be presented the main screen:
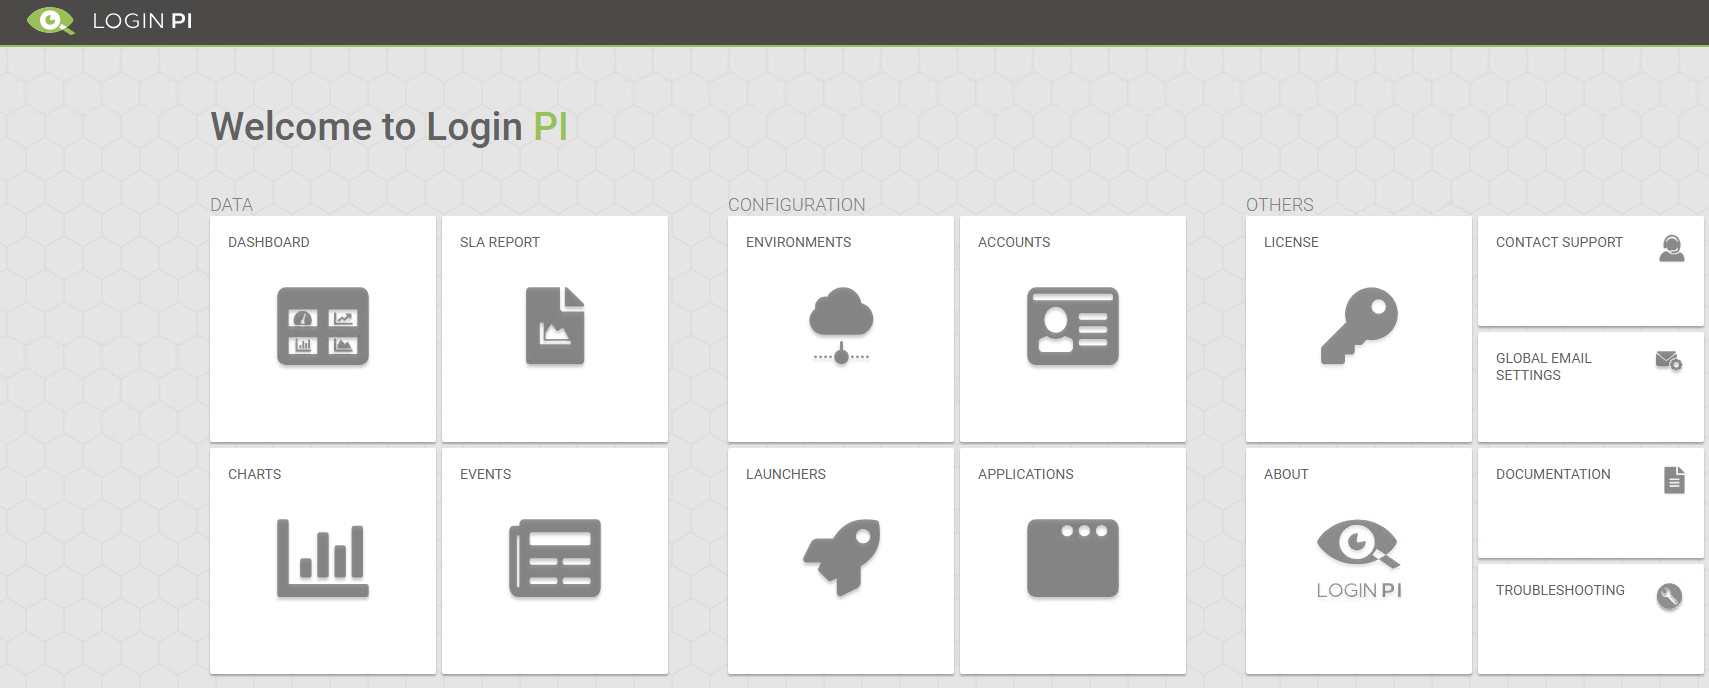 The main screen is divided into three sections, Others (which in this blog I will not go into), Configuration and Data.
Under configuration you can access the Launchers used to initiate the sessions towards the enviroment, when clicking on Launchers the following page will be loaded:
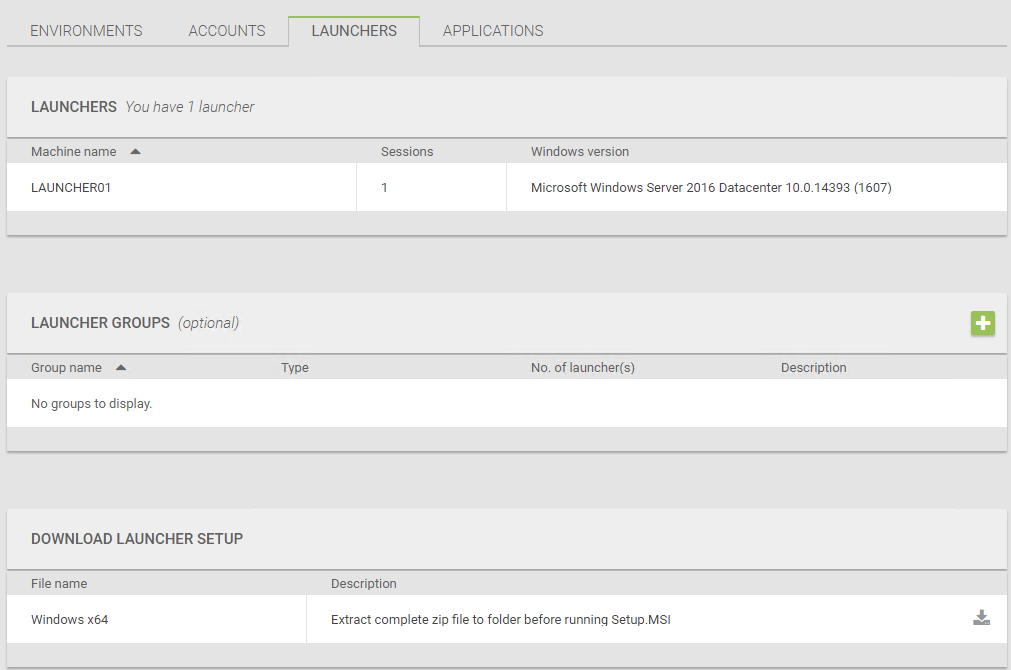 On this page you can download the Launcher setup and install it on any Windows device (Windows 7 x64 or up, including server OS). Once a launcher is running, it will appear on this screen.
Clicking on accounts will bring us to the accounts page.
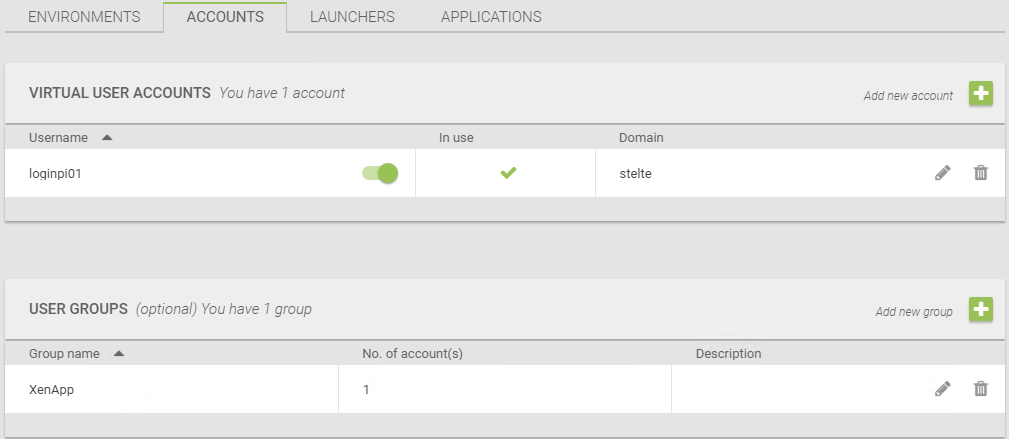 All accounts that will be available to conduct measurements will be added here. User groups can be used to seperate certain users to logon to certain environments (but will not go into detail about this in this blog).
Finally we go to the Environments page, where you can configure the Envrionments you want to test.
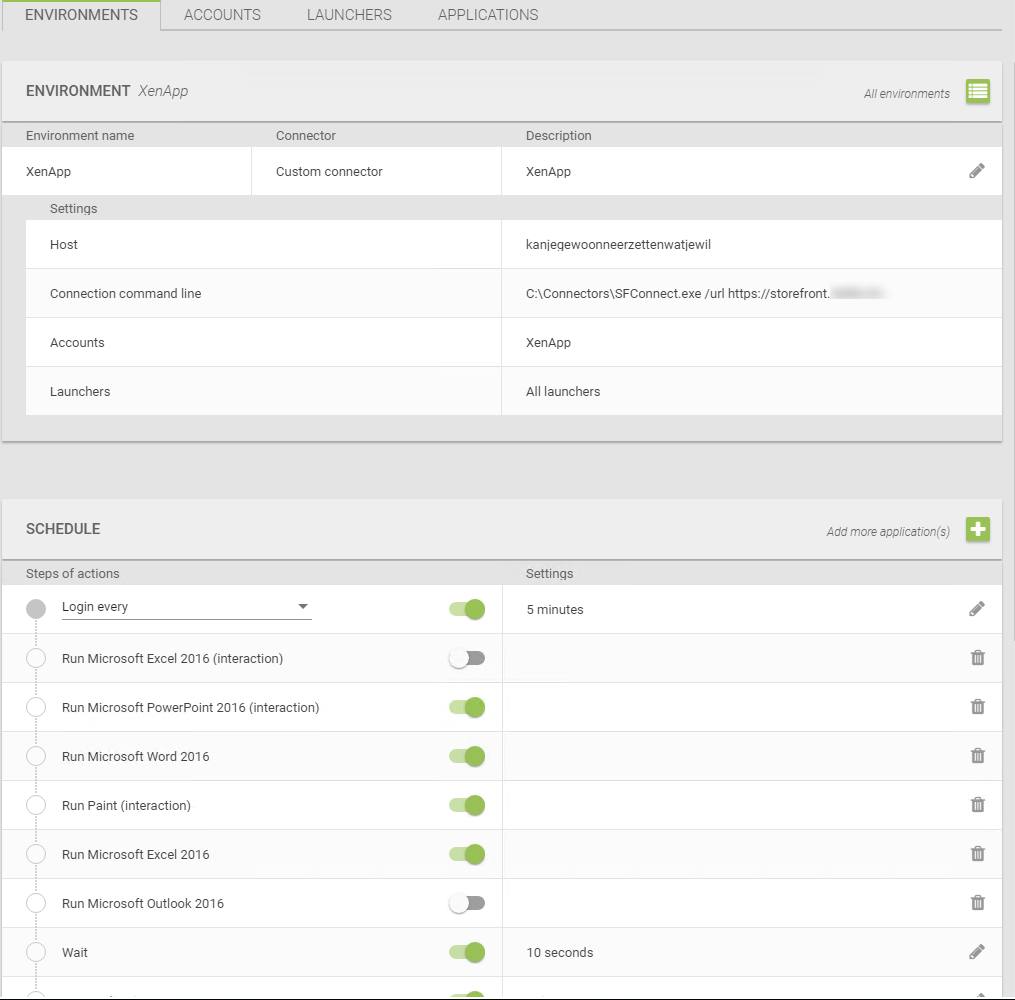
In the enviroment you will confgure the type of connection, what users will logon and what applications will be used.
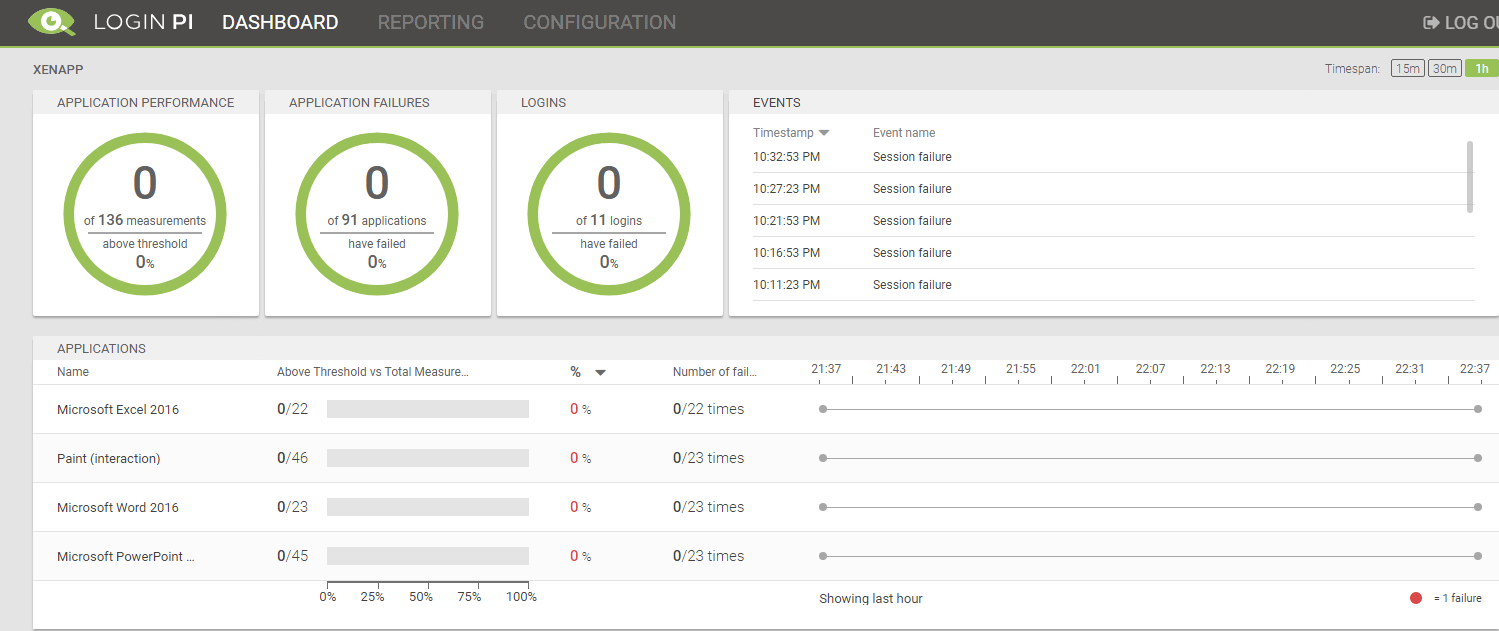
After the enviroment is setup and everything is fine, you will see the following in the Data > Dashboard.
When clicking on the application you will see the following:
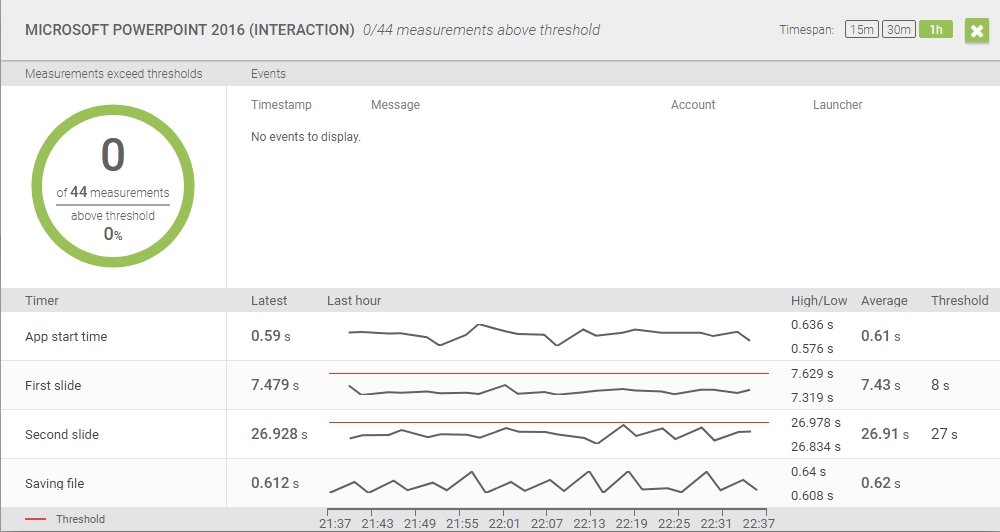 If an application has several actions defined you will see all action duration and if a threshold is configured you will see how the response times compare to the threshold.
Login PI 3 will give insight in the behavior of your applications in your environment, custom actions can be configured, but you will need to do some coding in Visual Studio Code.
Some tips from my side if you are going to start with Login PI:
Start out with default applications
Don't configure a threshold right away, do it after having Login PI run for atleast 2 or 3 days, this way you will know what "normal" is in your environment. Or set the thresholds according to KPI's that are determined within the organisation
When doing custom actions make them look like your real end-user will do
Use the validation options provided by Login PI
Although Login PI does give a good insight the lack of logon time measurements is something that most organisations will miss.
I am looking forward though to enhancements and improvements in the next couple of months. When there is any news on that front I will add new blogs. Also I will create a blog to explain something about creating custom actions in applications.